
Mapping Oral Histories with Google Earth Pro
Oral history is the oldest form of knowledge sharing. Today, we continue to tell our stories, with a new variety of mediums, including digital maps in software like Google Earth Pro. In Google Earth Pro, it’s possible to identify specific places, paths and areas of cultural significance using points, lines and polygons. Embedding photos, videos, and audio adds detail to your map. This, in its simplest form, is cultural mapping.
Google Earth Pro is the perfect software for mapping oral histories because it’s free, easy to use and showcases the world as it is in real life. Add some multimedia, and suddenly you’ve got a rich, immersive experience for telling your story.
What is the Difference Between Google Earth and Google Earth Pro?
You’ve probably heard of Google Earth, but did you know about its more powerful cousin, Google Earth Pro? Where Google Earth is a web tool, Google Earth Pro is a downloadable desktop application that offers a more extensive range of features than Google Earth. Both are great for cultural mapping, but we generally recommend Google Earth Pro for its additional tools and offline access (meaning you can access it, even without internet).
How to Get Started With Mapping Culture In Google Earth Pro
1. Decide on a Project
With so many rich stories within our communities, sometimes deciding where to begin is half the hurdle. But don’t let that hold you back. You can truly start anywhere. Maybe your starting point is sitting down with your Nan and listening to her recount how she lived and spent her time in the early years of her life. Maybe your starting point is putting your Mob's language on the map. The traditional name of local bushfood, or the name of the river that runs through your Country. Perhaps even the story of the importance of that river. Our newest GIS Intern, Shelley, decided to start a project mapping her family's history, embedding links from external sources and multimedia. It’s a personal project she will continue to return to over time.
“My first Google Earth Pro project began with me mapping my home and running routes, which progressed to locating places of significance to my family. This evolved into online research, where I gathered information and used links to websites and photographs to enrich our family map. Now, I am eager to delve deeper into my family history and document more locations on my map. This mapping exercise has uncovered many surprising insights; the more I investigate my family, the more I discover. In recent weeks, I've even made family connections previously unknown to me before starting this journey.”
Shelley Thorne, GIS Intern
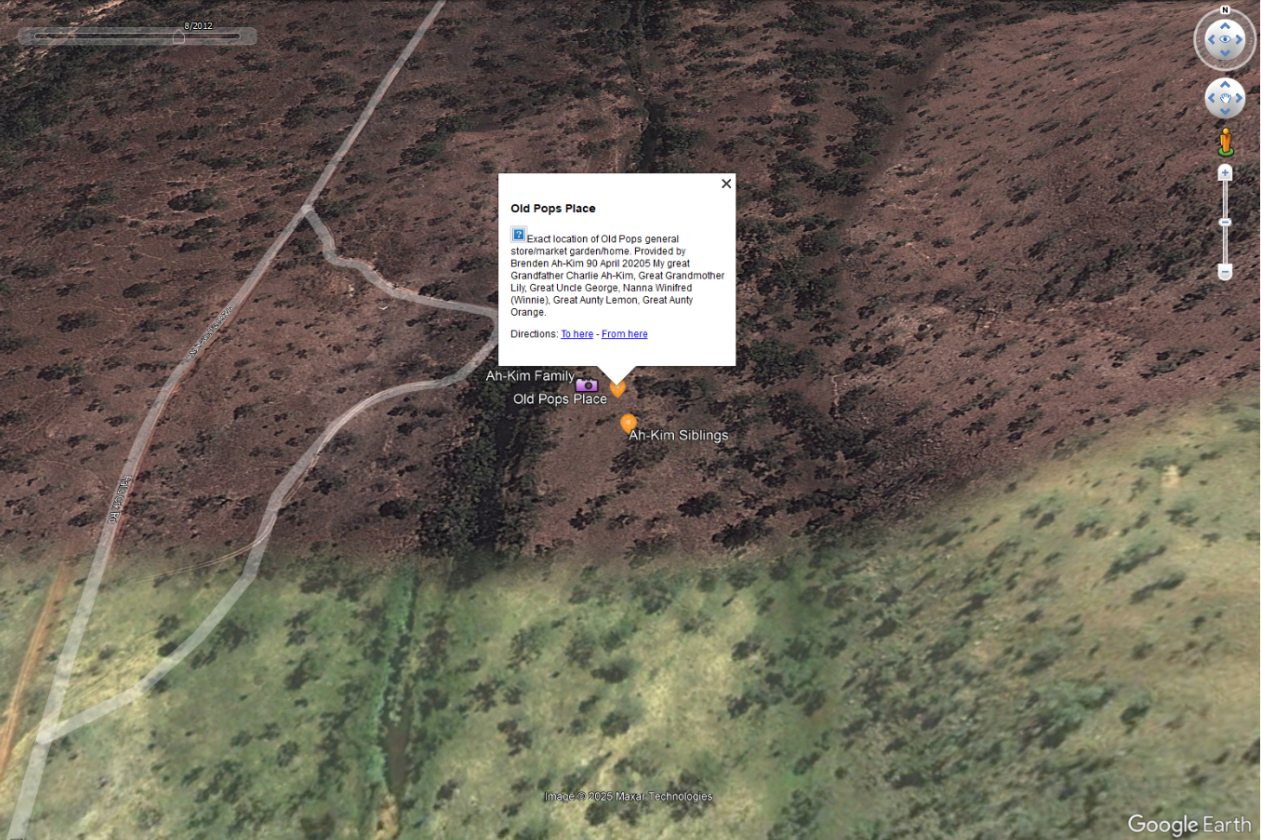

Images from Shelley Thorne’s personal cultural mapping project.
Shelley says to people starting out, “Take a look at your house or a place you have been before, maybe where your Mob are from. You will love it”.
2. Make a plan
Once you’ve decided on the topic, direction and purpose of your project, you’ll need to think about where you’ll get your data from. When we say data, we just mean information. This information you might have already, you might find it online, or it could be in the minds of your Elders. To begin, think about:
What do I know already?
Who would I like to learn from?
What questions do I want to ask?
Hot tip! Sometimes your purpose or your plan can change and that’s okay! You can always re-evaluate and make a new plan to align with your goals.
3. Collect data
As we’ve touched on above, there are a few different sources where you can collect data from. You might start searching online, looking through family photo albums, or you might choose interviews (or a combination of the above). If you’re going down the interview path, note that you really don’t need much. Prep with a list of questions, get Google Earth Pro open on your laptop, tablet or desktop and a phone for recording. Don’t be afraid to keep it simple!
You can also break this down into smaller steps, and don’t have to do all of this at once. Your cultural mapping method is something that can be added to over time.
4. Process data (upload it to your computer)
Got data (information)? Brilliant! The next step is to upload it to your computer. It’s important to keep everything organised. If you haven’t taken our Deadly Data course, we highly recommend it to teach you the foundational skills for data processing and management.
Sign up to IMW On Demand and start Deadly Data today.
5. Start mapping!
Here’s where the fun begins. Now that you’ve gathered your stories, it’s time to bring them to life by connecting them with specific places. Below, we’ve got some instructions for a few basic actions you may want to do in the Google Earth Pro software to visualise your data.
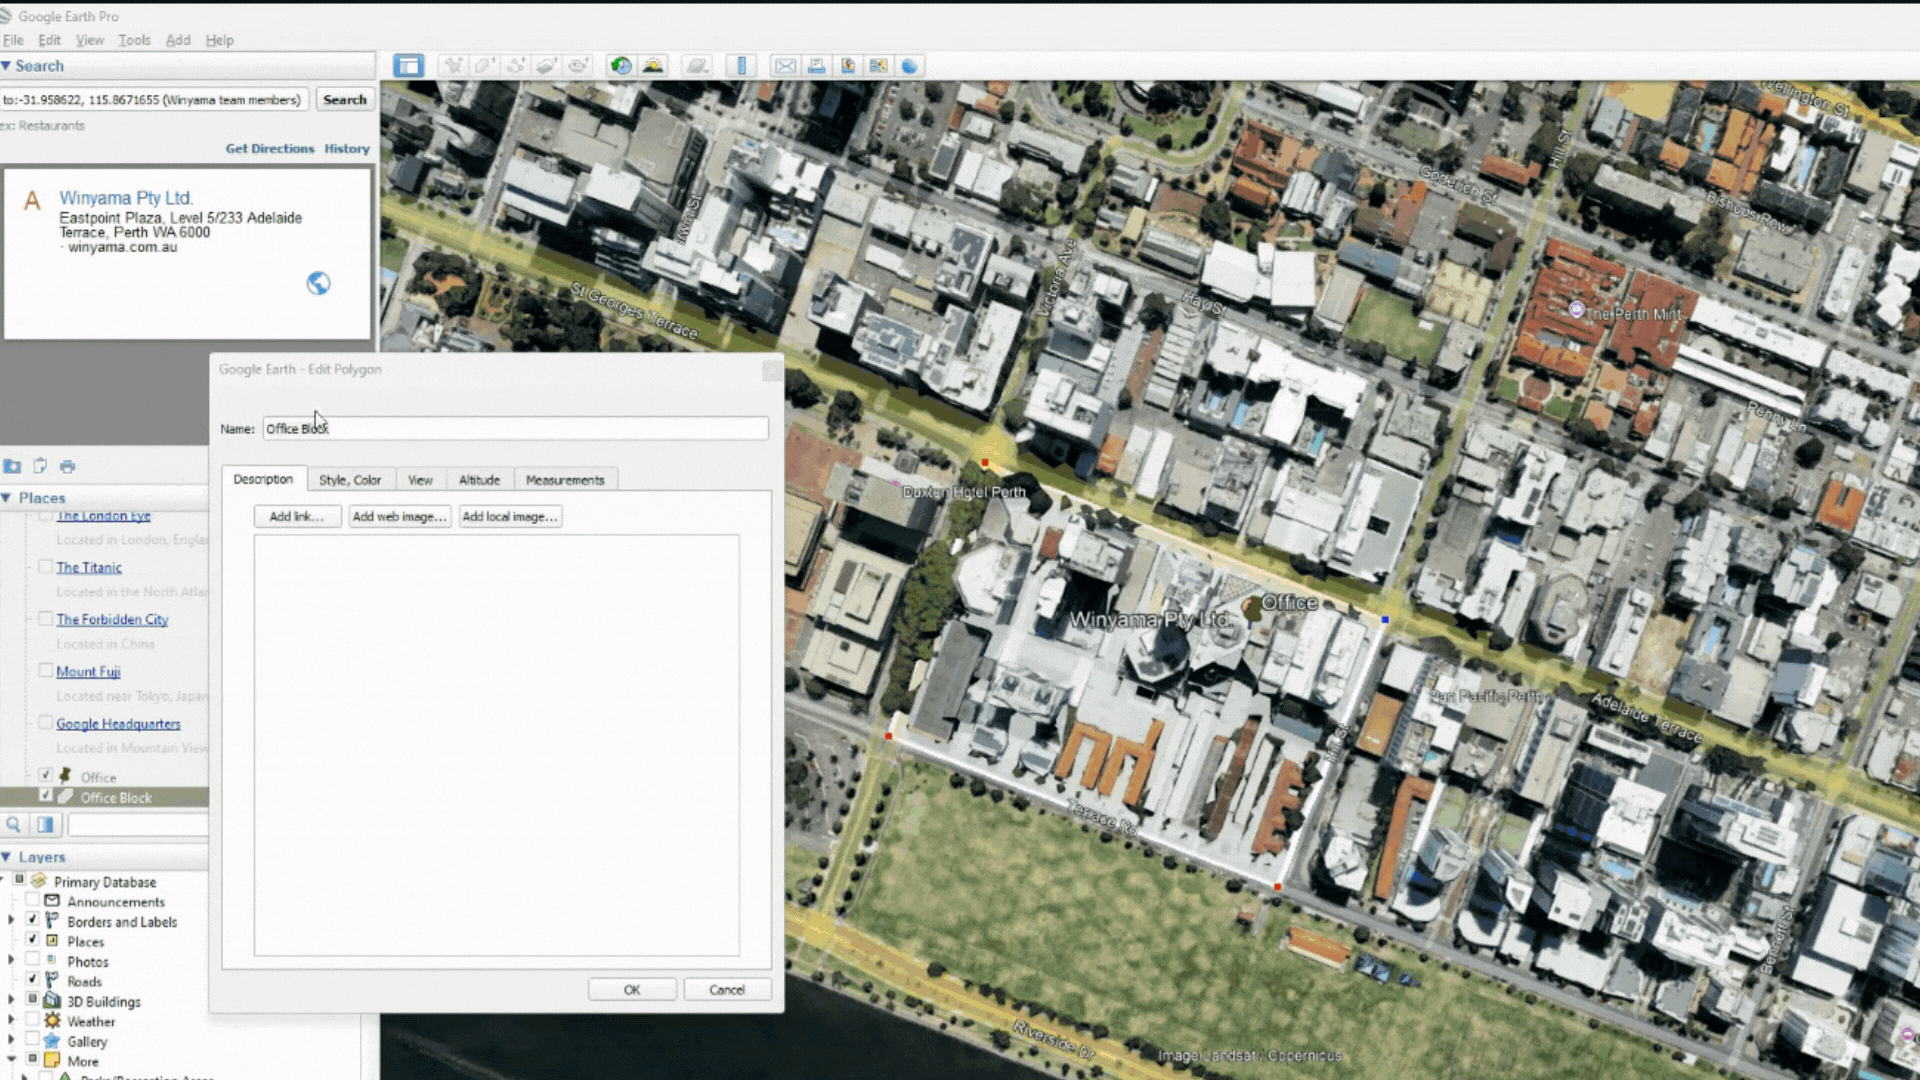
How to Add a Placemark, Line or Polygon
These are three common methods you can use to mark your map. If you continue mapping, you will hear these terms used a lot.
A placemark is a pinpoint of a location. Like ‘office’ or ‘home’.
A line is a path that can take you from point A, to B, to C, etc. This could be your commute.
A polygon marks an area's boundary. This could be the block where your office building is located.
Google Earth Pro keeps all these tools together in the top bar of the software.

Google Earth Pro navigation bar.
Don’t have Google Earth Pro downloaded on your computer? Click here to download Google Earth Pro for free and follow along.
The process of creating a placemark, a polygon, or a line is the same. Start by selecting the appropriate icon for the thing you want to do from the application bar at the top of the software, and when you are happy with the location, left-click. In the example below, I am creating a polygon of the block the Winyama office is on.

Gif showing the creation of a white polygon in Google Earth Pro.
Make sure to label your creation. If you would like to, you can adjust the thickness of the boundary line and its colour by selecting: ‘Style, Color’. For simplicity, I have kept the polygon white and the area white.
Gif showing how to change the colour of a polygon in Google Earth Pro.
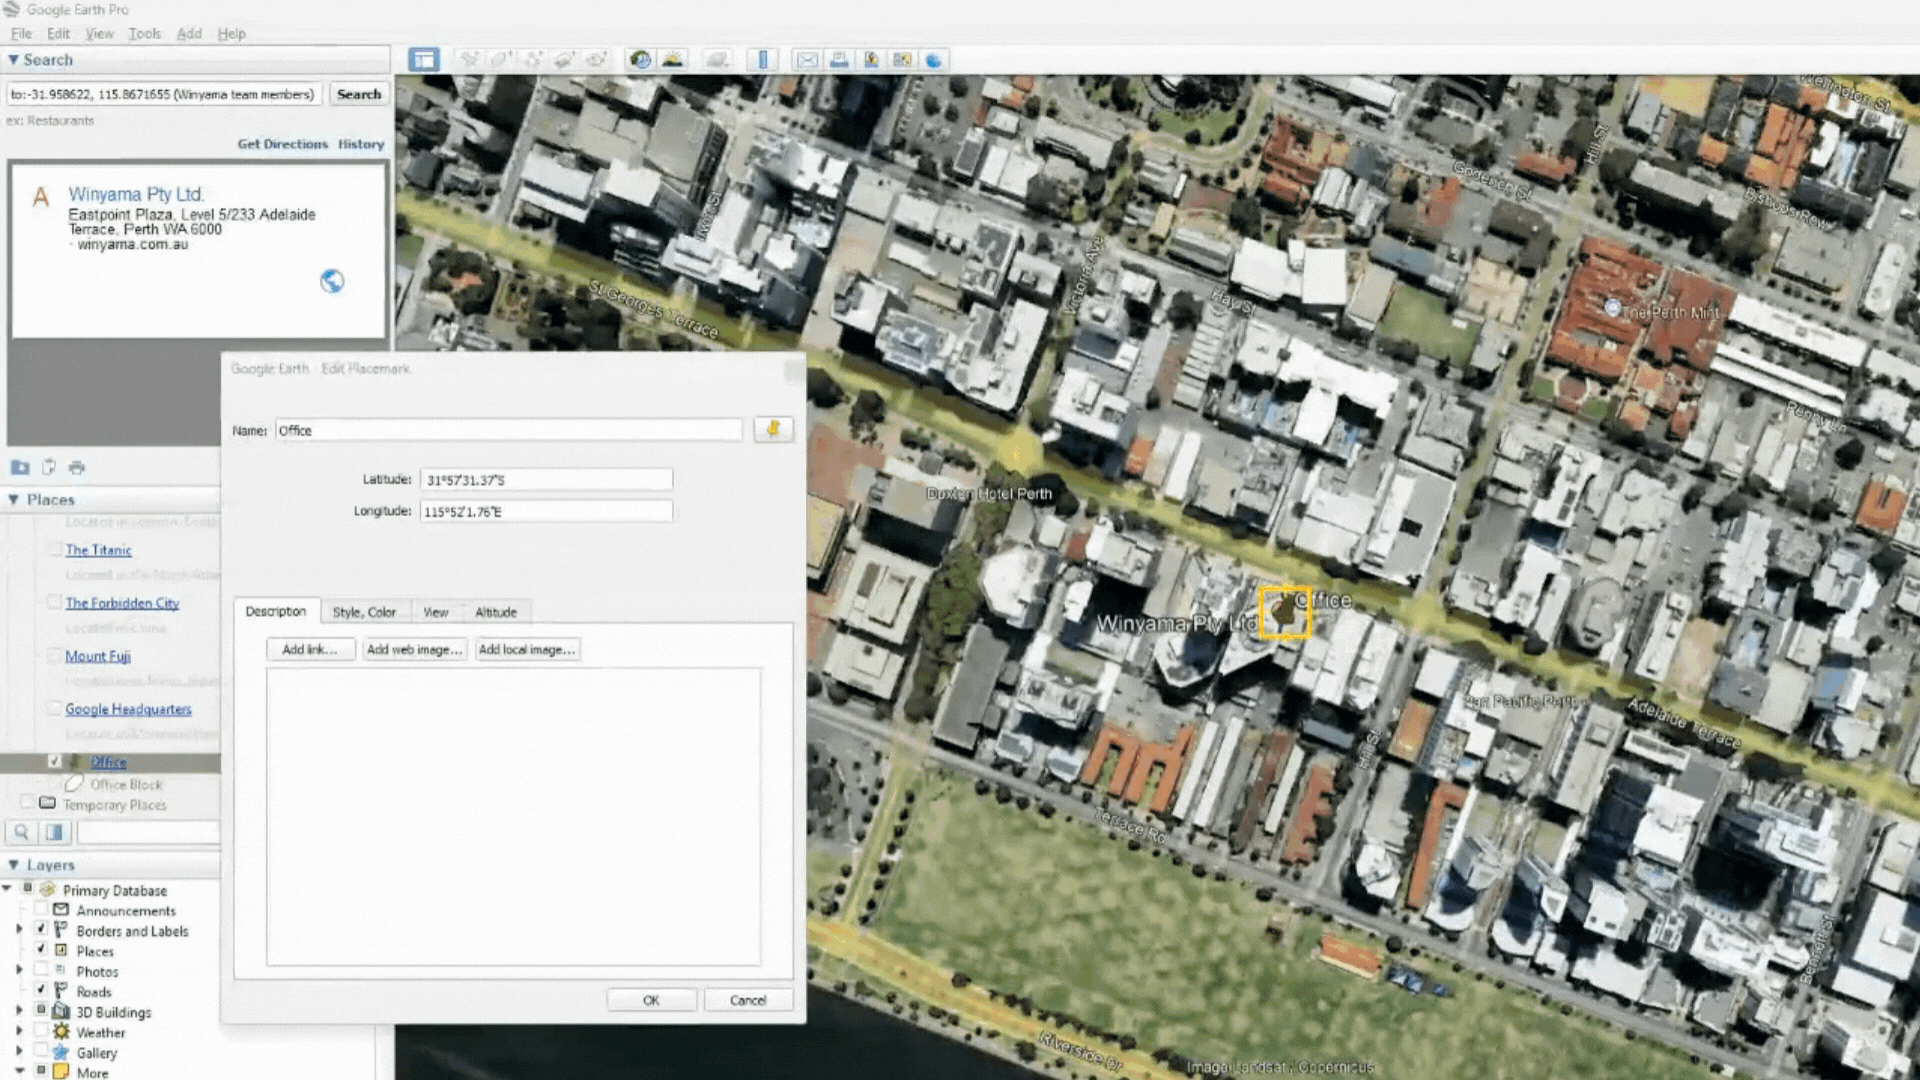
How to Add Multimedia to Your Google Earth Pro Project
You can add multimedia (photos/videos/audio/link) elements during or after your creation of a placemark, line or polygon. To add a photo or link, tap on the place you’ve created, then select the appropriate button (Add link, Add web image or, Add local image). A web image is a video that is hosted on the internet. A local image is an image that is saved on your computer.
Gif showing how to add a local image to your map in Google Earth Pro.
Videos are a little different. You will need to upload them to a third-party hosting platform (like YouTube). You do not need to make this video public to everyone in order to link it in your map (we show you how to do this in our course!). When it has been uploaded to the third-party platform, copy the link and paste it in the ‘Add link’ section.
These are just a few of the tools you can utilise in Google Earth Pro but there’s so much more you can do!
If you are looking to learn more about the application of Google Earth Pro, you can check out our free Google Earth Pro online courses available via IMW On Demand.
If your organisation would like to map your Mobs’ own stories and undertake your own cultural mapping project, Winyama offers Supported Indigenous Mapping Workshops designed to empower your staff with the skills to be able to do it yourself. Send us an enquiry to find out more.
If you’d like to learn more about our cultural mapping methodology, download our direct to digital information sheet here.